Saturday, May 11, 2024

Link Lovey Crochet Pattern (Closing down my Etsy Shop - Here are the patterns for free)

Link Lovey


Materials Needed:

Size F Crochet Hook (3.75mm)

Size H Crochet Hook (5.00 mm)

Green, Tan, Yellow, Brown Worsted Yarn

Small amount of pink yarn

Small amount of white worsted yarn

2 9mm Safety Eyes

Fiberfill

Yarn needle


Stitches and Abbreviations st – stitch

mc – Magic circle ch- chain sc - single crochet dec - decrease dc – double crochet hdc – half-double crochet

sl st - slip stitch f/o – finish off


Blanket/Body

Green yarn

H hook

You will need to ch 1 extra at the start of the magic circle to make room for the first dc.

R1: (3 dc, 2 ch) four times in magic circle, join at the top of first dc with a sl st.  Pull hole closed. *The dc’s are the sides of the square, the ch’s are the corners.


R2: Ch 2, turn, dc in the same stitch the chain is in. 5 dc into the corner (the corner being space made by the 2 ch on the previous row). Dc around doing 5 dc in each corner. Join with a sl st in the first dc of the round. 


Notes: Skip over the original ch 2 and put the sl stitch directly in the first dc to avoid a seam!


Optional: For extra pointy corners make the 3rd dc of each corner a triple crochet stitch (tc)


R3: Ch 2, turn, dc in each st across. At each corner do 5 dc in the 3rd st of the previous row’s 5 dc. R4-10: Repeat R3.

F/o, weave in ends


Belt

H Hook, brown yarn

R1: Ch 96 - You want the chain to be long enough to wrap around the entire body/blanket portion and late flat against it so you can sew it on. For me this was 96 chains. Add or take away to this as necessary to fit your project.

R2: Turn, sc across. Finish off, leave very long end for sewing


Note: For all pieces apart from the blanket and belt section, do not connect rows. Once a row is finished go directly into the next row. It is worked in a spiral.


Head

F hook

Tan yarn

R1: 6 sc in magic circle (6)

R2: 2 sc in each st around (12)

R3: (2 sc, sc 1) around (18)

R4: (2 sc, sc 2) around (24)

R5: (2 sc, sc 3) around (30)

R6: (2 sc, sc 4) around (36)

R7: (2 sc, sc 5) around (42)

R8-12: sc around (42)

R13: (dec 1, sc 5) around (36)

R14: (dec 1, sc 4) around (30)

R15: (dec 1, sc 3) around (24)

R16: (dec 1, sc 2 ) around (18)

R17: (dec 1, sc 1) around (12)

Put in safety eyes between rows 10 and 11, with 7 stitches in between. Sew on cheek blushes two rows beneath eyes with pink. Mouth optional. Stuff.

R18: Dec around

Sew up hole, finish off leaving long end for sewing


Hat

H Hook, green yarn

R1: Ch 26, join last stitch to the beginning of the chain with a sl st, making a circle. Do not twist! Sc around chain, put in stitch marker. You are now working in the round.

R2-5: Sc around (25)

R6: Dec 1, sc 12, dec 1, sc to end of round (23) R7: Sc around (23)

R8: Dec 1, sc 11, dec 1, sc to end of round (21) R9: sc around (21)

R10: Dec 1, sc 9, dec 1, sc to end of round (19)

R11: Dec 1, sc 4, dec 1, sc 4, dec 1, sc 5 (16)

R12: Sc around (16)

R13: (Dec 1, sc 2) around (12)

R14: (Dec 1, sc 1) around (8)

R15: Sc around (8)

R16: Dec around (4)

Sew hole closed, weave in ends.


Arms

F hook, start with tan yarn

R1: 6 sc in magic circle

R2: 2sc in each st around (12)

Change to brown yarn

R3-4: Sc around (12)

Change to white yarn

R5: Dec 1, sc around (11)

R6: Dec 1, sc around (10)

R7: Dec 1, sc around (9)

R8: Dec 1, sc around (8)

Change to green yarn

R9: Sc around (8)

R10: Dec 1, sc around (7)

R11: Sc around

Sl st, stuff, sew hole closed leaving long end for sewing


Hair

This method can be a bit difficult to understand if you are a beginner. If you find you can’t grasp it you can embroider the hair directly onto the head with yellow yarn. There are some great hair embroidery tutorials online if you choose to go that route.

F hook, yellow yarn

R1: Ch 21, turn, ch 2, skip 2, sc 1, ch 5, skip 5, sc 1, ch 6, skip 6, sc 1, ch 2, skip 2, sc 1. At this point it should look like this. See the four oval holes?


Starting in the first small oval, enter your hook on the outside of the piece. Start working the hole as if it was 4 stitches in the round. Sc all the way around the small hole. Do this for two rows. On the third row dec 1, sc 1, dec 1, sc 1 and sew up the hole. Cut the yarn.


Now move to the next chain circle of 12 stitches and join more yarn from your skein.

Again enter your hook on the outside of the piece and work the stitches in the round for one row. This piece of hair needs to have a curve in it like it’s being brushed to the side. To accomplish this: on one side of the hair do hdc and on the opposite side to sl st. See picture:


For the side closest to the piece you’ve already worked do two hdc, and for the opposite side do 2 sl st. Do this on every row until the end, and don’t use these sections for the decreases. 


Back to the pattern: In this hole you’ve done one row in sc all the way around, now do another row of sc with the hdc’s and sl st’s described above on the edges. At the beginning of row 3, dec 1 in the front section and dec 1 in the back section. Don’t let them overlap with the hdc’s and sl st sections. Do this for the next 3 rows. Finish off, sew up hole.


For the next 10 stitch oval enter your hook from the outside and sc all the way around. For the next 3 rows, dec 1, sc 1. Finish off, sew up hole.


For the final small oval repeat what you did in the first oval. When it’s done it should something look like this. Do not stuff.


Assembly

Sew the hair securely onto the head and then attach the hat to overlap the hair a bit so he doesn’t end up with a bald spot.


 Sew the two arms on the bottom of the head at row 17, pointing outwards. Sew the belt flat against the blanket all the way around. Ideally it will go around in a square and the corners of the belt will match the flat sides of the blanket. See the picture for further clarification.


Now sew the head to the middle of the blanket with the face pointing toward one of the corners. 


Tuesday, February 2, 2021

Animal Crossing Figures 3D Prints! My process


In 2020 I got really, REALLY into the world of 3D printing. And that also happened to coincide with getting overly obsessed with Animal Crossing. 

I also found out last year that I have raging ADHD and hyperfocused obsessions are a big part of ADHD. This blog alone is a testament to that, I went HARD on crochet for awhile and got absolutely bored of it quite suddenly. I have many hobbies like that. I'm currently working on medication options but I also kind of like myself the way I am. I don't mind having a carousel of hobbies I cycle through intensely. It's also probably why this blog doesn't really have a cohesive theme, it's kind of whatever I'm feeling. But I'm not out to be a professional blogger or anything, I just like to share ideas and techniques I thought were neat at the time.

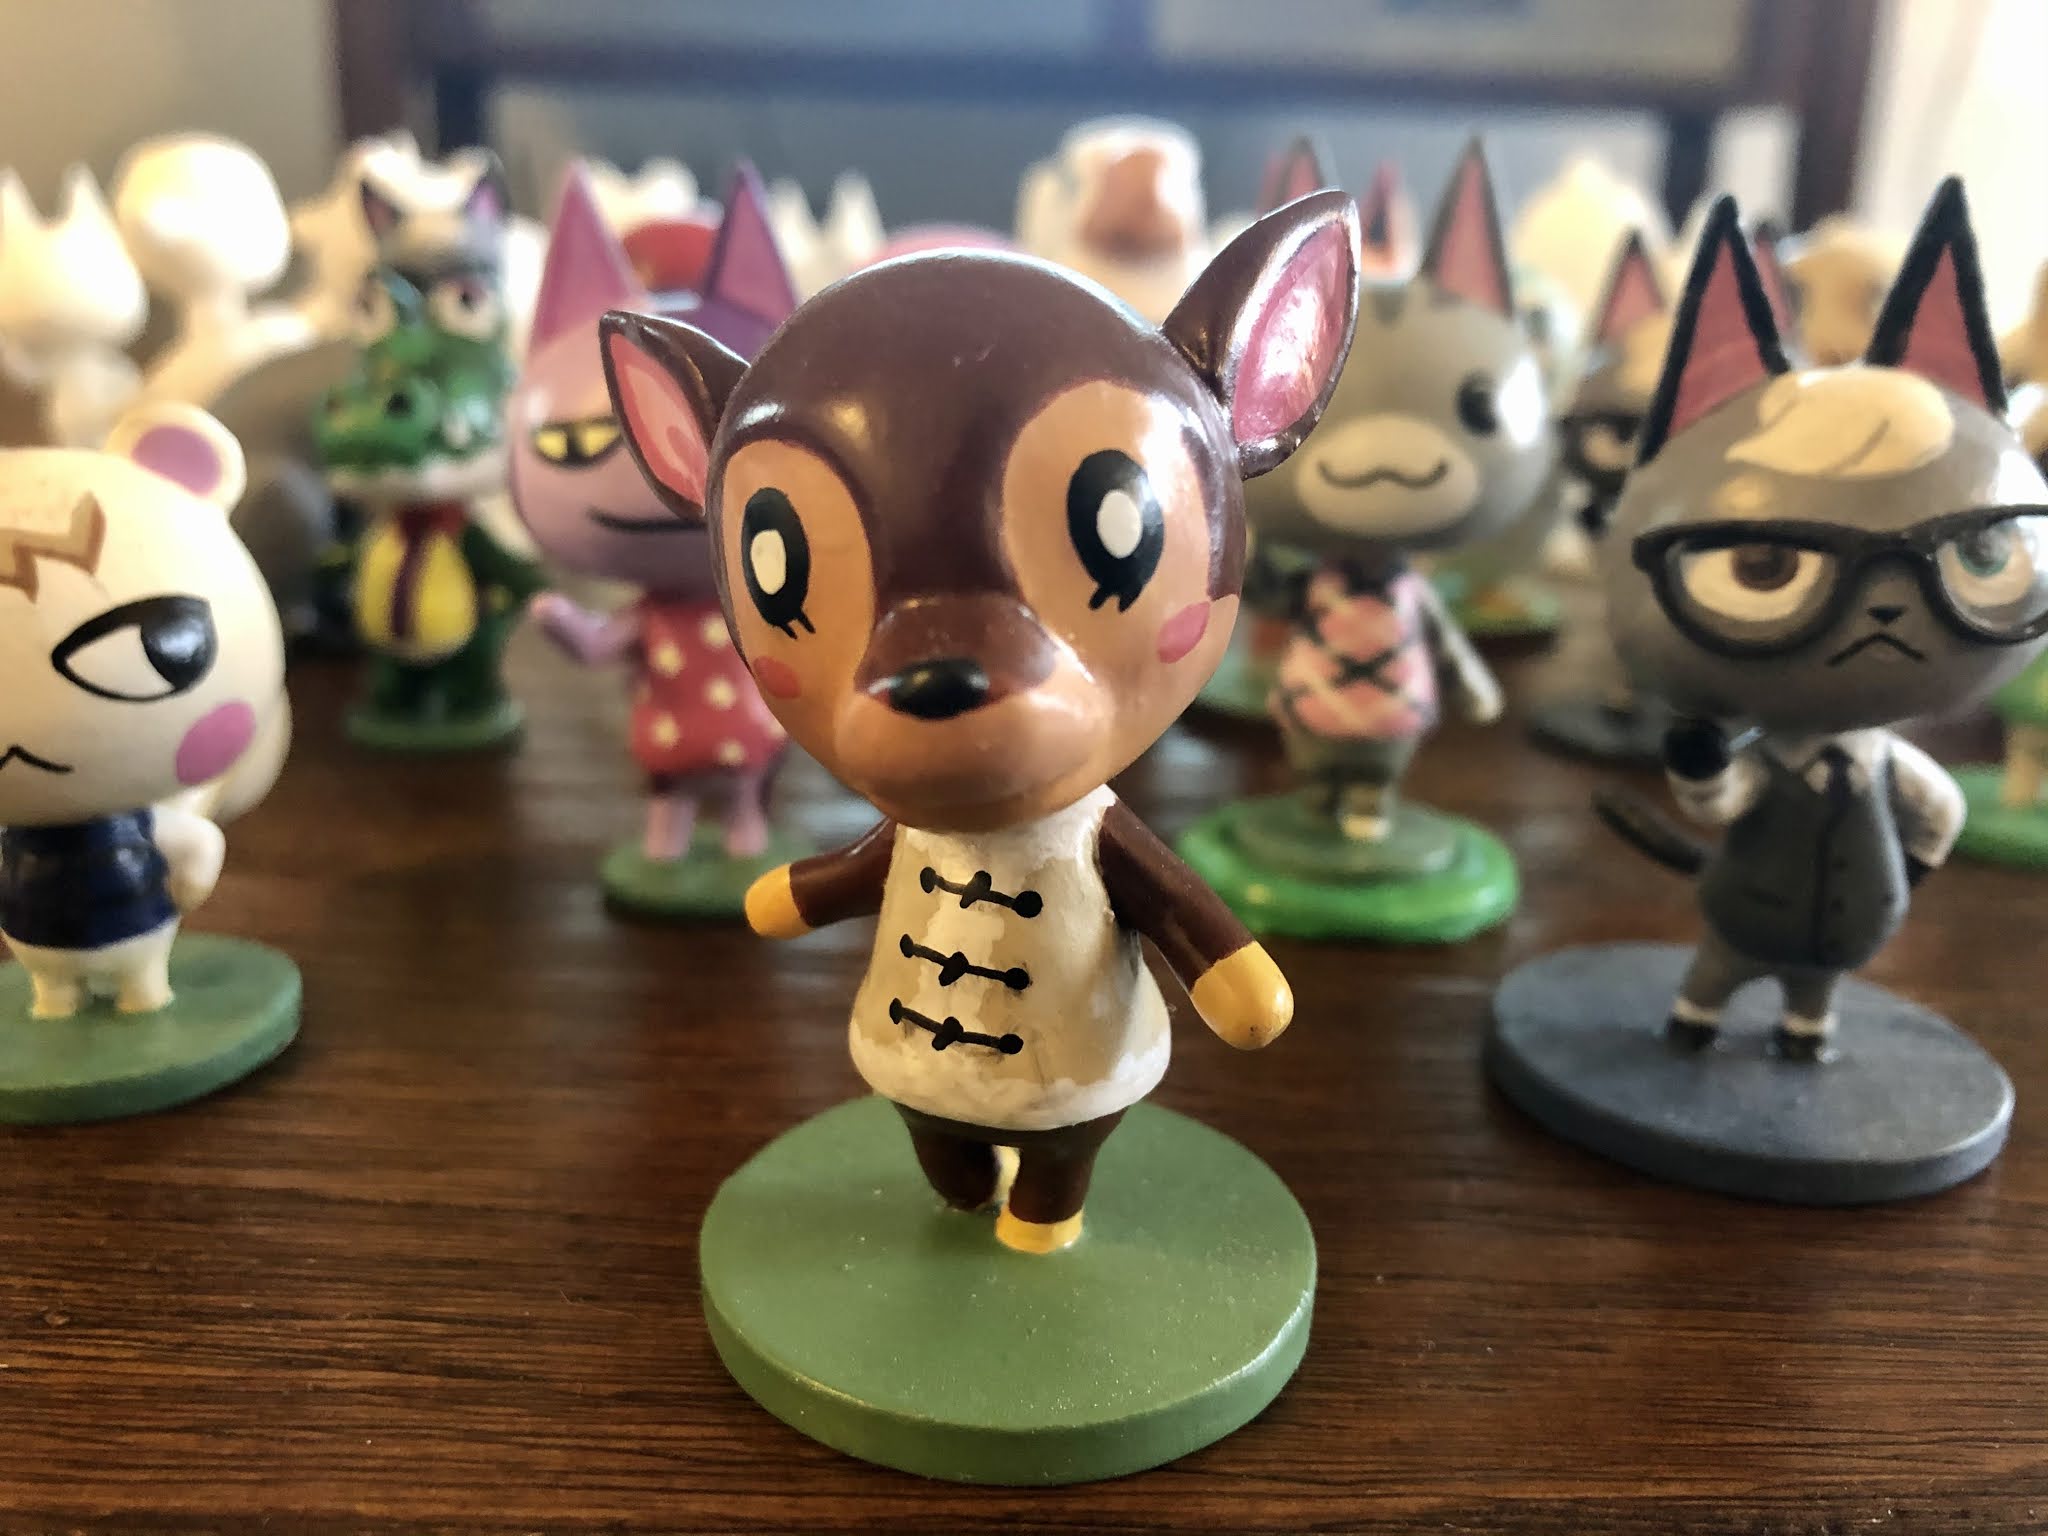
When Animal Crossing New Horizons came out I wanted to 3D print my favorite villager, Fauna. She is a super sweet deer who will make your heart bigger. Surprisingly, no one had yet made Animal Crossing figures that were 3D printable. I decided to give it a go myself. I downloaded the T-posed model from the mobile game Pocket Camp and set to work trying to pose it and make it 3D printable. Progress was slow. Just getting her arms from straight out to down felt impossible for a good while. 

I finally had a breakthrough with an old but free program called Sculptris, made forever ago by the makers of ZBrush. Through masking and the move tool I managed to pose her. I added a base and cut it in half in the stock 3D program with Microsoft and it actually printed on my printer. 


Clearly I needed to make more! I want everyone with access to a 3D printer to be able to print their favorite villager. 

I am pleased to say that it was a successful project, and almost every villager type is available on my Thingiverse and Cults3D accounts now. https://www.thingiverse.com/skelei/designs  https://cults3d.com/en/users/skelei

I printed almost all the models to make sure they worked. Some I've painted, some I've sanded and primed, and some I've just done some initial clean up. I have a few wooden boxes full of these figures and they aren't bringing joy to people just sitting in my house. I've decided to sell them off at a nice discount. The following will be a write up on how I process and paint my figures for anyone that buys an unfinished one from my Etsy store or prints one themselves.

First things first, why do I print the figures in two halves? Why don't I just print them as one piece? Well two reasons. First, the 3D printer makes removable, supporting structure for anything that overhangs. The arms and heads have a lot of this structure, so it has something to print on as it’s adding layers. When you remove this supporting material it leaves roughness and defects on the print. By cutting it in half and printing the flat side down, it vastly reduces the amount of support material necessary and results in a smoother finish. The second reason is strength. The thin places, like the legs and neck, are weak when printed as one piece. The printer adds material layer by tiny layer, horizontally, and that creates a weakness on the horizontal plane. Thin areas will crack and break along these lines with surprisingly little force. By making the horizontal plane vertical (by having the model lay sideways on the bed) it adds a lot more durability and strength to those small parts. Though that’s not to say it’s indestructible, I accidently dropped a figure and stepped on it and it was very sad to have to throw it in the recycling.

My models are printed, cleaned up with flush cutters, glued together with Loctite superglue, then the seam is filled with Perfect Plastic Putty. This putty is high quality and cost effective but water dissolvable, so it's not a good idea to dip the figure in water.

When glueing line up and glue the base first, and let dry. Then the head and the rest. That lets you correct for any warping.

Next steps are sanding and priming. You don’t have to sand if the layer lines and occasional rough spot of the print don’t bother you. Go ahead and throw on a coat of white primer and paint. But if you want a smoother result it’s time to sand. I use three grits of dry/wet sandpaper (gray type), 240, 500 and 1000. Start with the lower number (rougher) sandpaper. Scrub the figure down with special attention to the rougher spots. Then move to the next number, then the next. 

At this point you have two options. You can get a regular white primer (I use Krylon ColorMaxx White Primer) spray it (OUTSIDE) and then you’re good to paint it within a day. If, however, you’d like an even smoother surface, the next step is Rustoleum 2n1 Filler and Sandable Primer. Spray the figure, wait a few hours. Now get the sandpaper back out and put on a mask. Your covid mask is fine you just don’t want this stuff in your lungs. Go outside and use the sandpaper in the same order again. You can even get the sandpaper wet for even more smoothness. Just remember that the Perfect Plastic Putty Filler in the seam is water solvable so do be careful to not over wet those sections. Once that’s done you can spray it with a white primer and be ready to paint.

Acrylic paint is my go to for painting. The cheap craft paint from Walmart works fine and is the most cost effective. However, you must thin the paint with water. It will look chalky and bad if you slather it on at full thickness. I’ve painted many figures with cheap acrylic craft paint with fine results by thinning the paint to a milk-like consistency. If you want to get fancy with it and use paint meant for miniatures, I suggest Vallejo paint. More expensive but it is higher quality.

The important part to remember with painting is to build up in layers. Start with base colors. If your character is primarily blue, put on a thin coat of blue, let it dry completely, then add another layer. It really does pay off in the end. The number one mistake newbies make when painting miniatures is to add on paint too thick.

Add details at the end. You can thin the paint a little less for finishing details, think a honey-like consistency. Even if you make a mistake, you can always paint over it. Take your time.

Once you have the paint job how you like it, it is time to put a protective clear coat. Make sure all the acrylic paint is completely dry. I use ColorMaxx Crystal Clear Flat. This stuff pretty much melts down your paint and can even smooth out some imperfections. It is imperative you DO NOT touch it until it’s completely dry. It will rip all the paint off if you touch it early. I ruined a beloved project with this mistake and it still kind of hurts tbh.

Hope this is helpful and good luck!


Sunday, January 24, 2021

Totoro Lovey Free Pattern

Hello everyone, hope you're all doing well. I recently decided to make my totoro pattern free, Enjoy :)

Materials Needed: 
Size F Crochet Hook (3.75mm) 
Size H Crochet Hook (5.00 mm) 
2.70mm Hook 
Grey, white and black worsted yarn 
White Crochet Thread 
2 9mm Safety Eyes 
Fiberfill 
Yarn needle 

Stitches and Abbreviations 
st – stitch 
ch- chain 
sc - single crochet 
dec - decrease 
dc – double crochet 
hdc – half-double crochet 
sl st - slip stitch 
f/o – finish off 

Note: For all pieces apart from the blanket section, do not connect rows. Once a row is finished go directly into the next row. It is worked in a spiral.

Ears - Make 2
Grey yarn
F hook 
R1: 4 sc in magic circle (4) 
R2: Sc around (4) 
R3: 2 sc, sc , 2 sc, sc 1(6) 
R4: 2 sc, sc 2, 2 sc, sc 2 (8) 
R5 -6 : Sc Around (8) 
R7: Dec 1, sc 2, dec 1, sc 2 (6) 
R8: Dec 1, sc 1, dec 1, sc 1 (4) 
F/o, leave long end for sewing 

Eyes - Make 2
White crochet thread 
2.70 mm hook 
R1: 6 sc in magic circle 
R2: 2 sc in each st around (12) 
Sl st, f/o, leave long end for sewing 

Head 
Grey Yarn 
F Hook 
R1: 6 sc in magic circle (6) 
R2: 2 sc in each st around (12)
R3: (2 sc, sc 1) around (18) 
R4: (2 sc, sc 2) around (24) 
R5: (2 sc, sc 3) around (30) 
R6: (2 sc, sc 4) around (36) 
R7: (2 sc, sc 5) around (42) 
R8-13: sc around (42) 
R14: (dec 1, sc 5) around (36) 
R15: (dec 1, sc 4) around (30) 
R16: (dec 1, sc 3) around (24) 
R17: (dec 1, sc 2 ) around (18) 
Sew ears on top of head at row 4 
Put safety eyes through the white circles and then attach between R10 and R11 
Sew around the white to attach 
Use black yarn to sew on nose at row 12 and whiskers beneath eyes 
Stuff firmly with fiber fill 
R18: (dec 1, sc 1) around (12) 
R19: Dec 1 around (6) 
F/O and sew up the hole 

Arms -Make 2 
Grey Yarn 
F Hook 
R1: 5 sc in magic circle (5) 
R2: 2 sc in each st around (10) 
R3-14: Sc around Stuff with fiberfill 
F/O and sew hole closed Leave long end to sew onto head Use black yarn to give him “claws” 

Blanket/Body 
Start with white yarn 
H Hook
You will connect rows on this section. You will need to ch 1 extra at the start of the magic circle to make room for the first dc. 
R1: (3 dc, 2 ch) four times in magic circle, join at the top of first dc with a sl st. Pull hole closed. *The dc’s are the sides of the square, the ch’s are the corners.


R2: Ch 2, turn, dc in the same stitch the chain is in. 5 dc into the corner (the corner being space made by the 2 ch on the previous row). Dc around doing 5 dc in each corner. Join with a sl st in the first dc of the round. 

Notes: Skip over the original ch 2 and put the sl stitch directly in the first dc to avoid a seam! 

Optional: For extra pointy corners make the 3rd dc of the corner a triple crochet stitch (tc) 

R3: Ch 2, turn, dc in each st across. At each corner do 5 dc in the middle stitch of the previous row’s 5 dc. 
R4-8: Repeat R3. Switch to grey yarn 
R9-14: Continue to repeat R3. Switch to black yarn 
R15: Sc around. At corners chain 2 and then continue to sc around. 
F/o, weave in ends

Assembly 
Sew the arms securely onto the bottom of the head at row 16, pointing outward. Sew the head onto the middle of the blanket, face pointed toward one of the corners. Sew upside down grey V’s onto the front of Totoro’s belly. 

Troubleshooting: Is a piece coming out way too small? I tend to crochet between medium and loose tension. If you crochet tight and things are coming out small you might want to move up a hook size or two. Also make sure you are using the right weight of yarn. This is written for worsted weight, if you are using something lighter it may affect the finished size. 


Wednesday, January 23, 2019

Hello again, it's 2019

According to Blogger my last post was in 2015. It's been awhile. I moved a couple of times since then but now I live in North Carolina. What have I been up to? I still crochet, though way less than I use to. Here is a bunny toy I made for my friend's baby. I really like how it turned out. I may post the pattern eventually.


Way back in 2013 my #1 favorite game of all time (Tales of Symphonia) was rereleased and my best friend and I had a small party in celebration. I handmade a paper chain of the characters as decoration. 

I bought a paper cutting machine (cricut) this year and decided to make it again. Super pleased with how it came out and thanks to the cutting machine my hand isn't aching for a week from the scissors. I've had a few requests come through since I posted the original to buy one, I went ahead and put it up in my etsy shop for anyone that loves that game as much as I do.


Here is what it looked like with all the pieces laid out before I glued them:


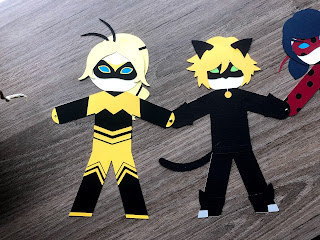
On Netflix there is a show called Miraculous Ladybug. I put it on to watch with my kindergartener and accidentally got completely hooked. I am not the target demographic but the main characters are so precious. I've become incredibly emotionally invested. I made another paper chain with the main Ladybug characters. I especially like Rena Rouge, the fox one. That one is up on my etsy as well. I have a ton of fun making these chains and I will probably be making more. I'm hoping to put up a video soon of the process.


I went back to school for my Computer Science degree. I'm about a year in and I love it. I also work at a programming school for children. I still do a lot of crafts and I'm going to resurrect my blog and include stuff I made with my cutting machine cause goodness, it can do a lot. I've changed the blog name to Forgotten Fox so you'll see a new banner roll out soon. I might even post some of my illustrations. Thanks for sticking with me. I'm making an Instagram soon and I'll post it when it's ready so we can all follow each other.

Edit: I made an Instagram it's @ForgottenFoxDesigns

Tuesday, November 25, 2014

Another Pikachu Pattern

I've written yet another Pikachu pattern for you all. Enjoy :)


Please note that this pattern has not been tested. If you find any mistakes or oddities please let me know so I can update. If you find yourself stuck and needing help don’t hesitate to email me, we can work through it together. Ktstevens90@gmail.com

Materials
Yellow Worsted Yarn
Brown Worsted Yarn
Red Sock Yarn
Black Worsted Yarn
F Hook
10 mm Safety Eyes
Fiberfill

Instructions between * * are to be repeated until the end of the row.

Ears – Make 2
Start with Black Yarn
R1: Magic Circle 6
R2: *2 sc, sc 1* around (9)
R3: Sc around
R4: 2 sc, sc 2 (12)
Change color to yellow
R5 -11: Sc around (12)
R12: *Dec 1, Sc 4* around (10)
Finish off, stuff with fiberfill leave long end for sewing

Head
Yellow Yarn
R1: Magic Circle 6
R2: 2 sc in each st around (12)
R3: *2 sc, sc 1* around (18)
R4: *2 sc, sc 2* around (24)
R5: *2 sc, sc 3* around (30)
R6: *2 sc, sc 4* around (36)
R7: *2 sc, sc 5* around (42)
R8-12: Sc around (42)
R13: *Dec 1, sc 5* around (36)
R14: *Dec 1, sc 4* around (30)
R15: *Dec 1, sc 3* around (24)
Stuff with fiberfill
R16: *Dec 1, sc 2* around (18)
R17: *Dec 1, sc 1* around (12)
Finish off. I left the bottom open to sew onto the body. You can close it if you prefer by decreasing around until it’s closed.

Cheeks
Red Sock Yarn
R1: Magic circle 6
R2: 2 sc in each stitch around (12)
*Note* If the increases leave large holes then do the first stitch of the increase in the back loop and the second stitch of the increase in the front loop.
R3: 2 sc, sc 1 around (18)
Finish off, leave long end for sewing

Body
Yellow Yarn
The body is worked from the bottom up. To get the oblong shape start with a chain.
R1: Ch 7, turn, sc back across. After the last stitch on the chain instead of turning back you will go around and start working the starting chain’s other loop. sc in the each loop of the other side of the starting chain. You should end up with 14 stitches around that looks something like this:


R2: *2 sc, sc 1* 4 times, sc 6 (18)
R3: *2 sc, sc 1* 5 times, sc 4, 2 sc, sc 3 (24)
R4: *2 sc, sc 1* 9 times, sc 5, 2 sc (34)
R5-8: sc around (34)
R9: Dec 1, sc 15, Dec 1, sc 15 (32)
R10: *Dec 1, sc 6* around (28)
R11: *Dec 1, sc 5* around (24)
R12: Sc around (24)
R13: *Dec 1, sc 4* around (20)
R14: *Dec 1, sc 3* around (16)
R15: Sc around (16)
R16: Sc around (16)


Arms – Make 2
Yellow yarn
R1: Mc 6
R2-3: Sc 6
Finish off, leave long end for sewing

Legs – make 2
Yellow yarn
R1: Mc 8
R2-5: sc 8
Finish off, leave long end for sewing

Tail – Make 2
Yellow Yarn
R1: Ch 8, turn
R2: Sc 7, ch 1, turn
R3: Sc 7, ch 1, turn
R4: Sc 7, ch 5, turn
R5: Sc 7, Ch 1, turn
R6: Sc 7
Change color to brown
R7: Turn the tail and put three stitches of brown right in the bottom. These aren’t worked in existing stitches. Just stitch 3 across the side of the previous three rows. Ch 1, turn. 
R8-9: Sc 3, ch 1, turn
Finish off, leave long end of yellow for sewing to the other tail for better structure. Leave long end of brown for sewing onto the body.

Stripes - Make 2
Brown yarn
Ch 10
Turn, sc across
Finish off, leaving yarn to sew to body


Assembly

Put safety eyes between rows 9 and 10, 8 sts apart. Sew ears on top of head, they should span between rows 4 and 7. With black yarn sew a nose on row 11 between eyes with the mouth below on row 12. Place the cheeks between row 11 and 15. About 11 stitches in between. On the body, attach arms between rows 11 and 14, 7 sts apart. Place feet at row 4, 7 sts in between. Sew two tails together to increase sturdiness. Sew tail on the back middle at the bottom. If your Pika is heaving trouble balancing the tail can help it steady. Sew stripes on back, above the tail at rows 10 and 12.


Saturday, May 3, 2014

New Pattern in Store, Link Lovey

Good morning everyone, I have a new pattern available in my shop. It's a Legend of Zelda Link lovey.


Enjoy :)

Tuesday, April 8, 2014

Tales Series Apple Gel Recipe


Anyone who really knows me knows that I LOVE the game Tales of Symphonia. I'm a fan of the Tales series in general but my heart lies with Symphonia. It has been my favorite game since I was 15. They recently re-released it for the PS3 with better graphics and added content. If you were wondering why I haven't posted lately that's why.

On the day it came out my friend and I made apple and orange gels. The orange gels were made by getting orange jello and following the directions for jigglers. Did you know that Jello doesn't make an apple flavor? We had to do it from scratch, it took three tries but was really fun.

This is what you need:

1 1/2 C Apple Juice
2 Packets Unflavored Gelatin (Found in the Jello section)
Red food coloring
Silicone molds - I got mine on Amazon here 


Put the apple juice in a sauce pan and simmer until it is reduced to 1 cup. This is necessary to enhance and amplify the apple flavor. You can add sugar but I didn't. Stir in 1 and half packets of the gelatin. It will clump up but turn the heat down and just keep stirring until it all dissolves. Put in 3-5 drops of food coloring until it is red like a real apple gel. 

Now you get to pour it into the molds. For this I put it in a ceramic tea pot so I could pour with more accuracy. Spray the molds with cooking spray.  Put the molds on a big tray or cookie sheet and make room in your fridge. Once you have filled each of the little mold cups put the tray in the fridge for an hour or two, until they are firm and pop out easily.  


For future batches you can mess with the amount of gelatin to change the texture and make them firmer or softer.

On release day we had a whole tales themed spread including Panacea (which was Pom pomegranate juice and I painted the bottle brown) and we mixed that with sprite. We also made Lil Smokies-Bacon-Pretzel pow hammers with little cheese stars. I spent two days making the character chain. I actually might love this game too much. Whatevs, can't help it.


Related Posts Plugin for WordPress, Blogger...