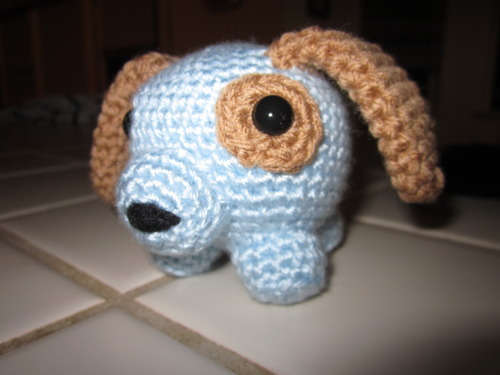
I think the Roly Poly Cats pattern by Nina Shimizu found here is super cute, but I wanted a dog version too. I took an evening and worked this pattern out, I like how it turned out. I also put a cat toy inside when I stuffed him so he rattles. :) Made two for both my cousins who had baby boys this year. Here is the link to the pattern on Ravelry: http://www.ravelry.com/patterns/library/roly-dog
I used an F hook and worsted weight yarn throughout.
This is worked in rounds, so don't join after each row. Just continue the spiral upwards. (Use a stitch marker if needed)
This is worked in rounds, so don't join after each row. Just continue the spiral upwards. (Use a stitch marker if needed)
Eye Spot - Color B:
R1: 6 sc in magic ring
R2: 2sc in each st around (12)
sl st, finish off, leave long end to sew onto body
Head - Color A
R1: 6 sc in magic ring
R2: 2sc in each st around (12)
R3:(sc 1, 2sc in next sc) around (18)
R4: (sc 2, 2sc in next sc) around (24)
R5: (sc 3, 2sc in next sc) around (30)
R6: (sc 4, 2sc in next sc) around(36)
R7: (sc 5, 2sc in next sc) around (42)
R8-15: Sc in each st around (42)
R16: (sc 5, sc2tog) around (36)
R17: (sc 4, sc2tog) around (30)
R18: (sc 3, sc2tog) around (24) - This is where I attached the eyes and started to fill with stuffing. I also added a cat toy as a rattle in the center. *Note* Make sure the safety eye goes through the Eye Spot before attaching to the head.
R19: (sc 2, sc2tog) repeat (18)
R20: (sc 1, sc2tog) around (12)
R21: Sc2tog around (6st) Cut yarn and sew up hole.
Nose - Color A:
R1: 6 sc in magic ring
R2: 2sc in each st around (12)
R3: 2sc, sc 5, 2sc, sc 5 (14)
R4: Sc each st around
sl st, finish off, leave long end to sew onto body, stuff
I used black yarn and a yarn needle to make a big black spot here for the nose.
R1: 6 sc in magic ring
R2: 2sc in each st around (12)
R3: 2sc, sc 5, 2sc, sc 5 (14)
R4: Sc each st around
sl st, finish off, leave long end to sew onto body, stuff
I used black yarn and a yarn needle to make a big black spot here for the nose.
Feet (4) - Color A:
R1: 6 sc in magic ring
R2: 2sc in each st around (12)
R3: In BLO sc in each st around (12)
R4-5: Working both loops from now on sc each st around (12)
sl st, finish off, leave long end to sew onto body, stuff
R1: 6 sc in magic ring
R2: 2sc in each st around (12)
R3: In BLO sc in each st around (12)
R4-5: Working both loops from now on sc each st around (12)
sl st, finish off, leave long end to sew onto body, stuff
Ears (2) Color B:
R1: 6 sc in magic ring
R2: 2sc in each st around (12)
R3-12: sc each st around (12)
R13: sc 6, leaving 6 unworked
sl st, finish off, leave long end to sew onto body. The ears are tubes but flatten them out so they are more like dog ears. Don't stuff this part!
R1: 6 sc in magic ring
R2: 2sc in each st around (12)
R3-12: sc each st around (12)
R13: sc 6, leaving 6 unworked
sl st, finish off, leave long end to sew onto body. The ears are tubes but flatten them out so they are more like dog ears. Don't stuff this part!
Tail - Color B:
R1: 6 sc in magic ring
R2-4: sc each st around (6)
sl st, finish off, leave long end to sew onto body
R1: 6 sc in magic ring
R2-4: sc each st around (6)
sl st, finish off, leave long end to sew onto body
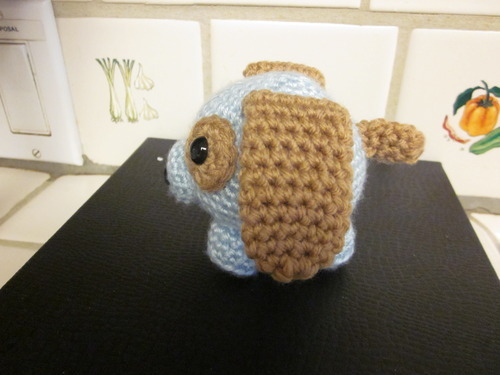
Sew it all together, you can use my picture for help with placement. Also I've never written out a pattern before so I apologize in advance for any mistakes. Email me if you find any :) ktstevens90@gmail.com